CA FTB 540 Instructions 2016 free printable template
Show details
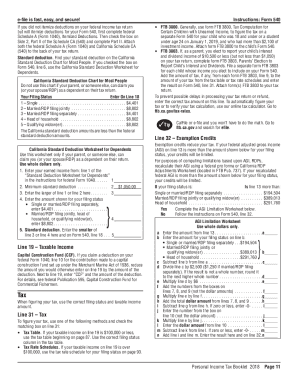
See the instructions for Form 540 line 114 for information about figuring your payment if any. Line 114 Total Amount Due Is there an amount on line 111 Yes Add line 111 line 112 and line 113. 2016 Instructions for Form 540 California Resident Income Tax Return References in these instructions are to the Internal Revenue Code IRC as of January 1 2015 and the C alifornia Revenue and Taxation Code R TC. For more details see instructions for line 73. Generally tax should not be withheld on...
pdfFiller is not affiliated with any government organization
Get, Create, Make and Sign
Edit your where to attch check form online
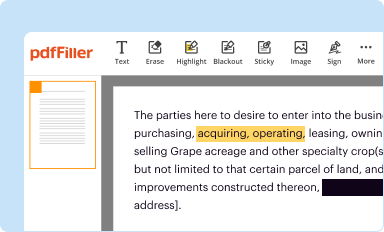
Type text, complete fillable fields, insert images, highlight or blackout data for discretion, add comments, and more.
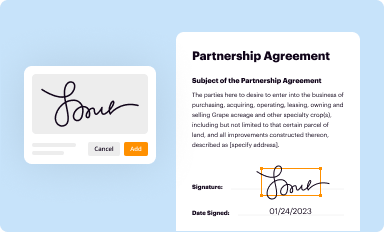
Add your legally-binding signature
Draw or type your signature, upload a signature image, or capture it with your digital camera.
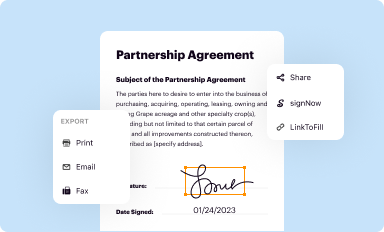
Share your form instantly
Email, fax, or share your where to attch check form via URL. You can also download, print, or export forms to your preferred cloud storage service.
Editing where to attch check to ca form 540 online


Here are the steps you need to follow to get started with our professional PDF editor:
1
Sign into your account. In case you're new, it's time to start your free trial.
2
Upload a document. Select Add New on your Dashboard and transfer a file into the system in one of the following ways: by uploading it from your device or importing from the cloud, web, or internal mail. Then, click Start editing.
3
Edit 2013 ca 540 instructions form. Add and change text, add new objects, move pages, add watermarks and page numbers, and more. Then click Done when you're done editing and go to the Documents tab to merge or split the file. If you want to lock or unlock the file, click the lock or unlock button.
4
Save your file. Select it in the list of your records. Then, move the cursor to the right toolbar and choose one of the available exporting methods: save it in multiple formats, download it as a PDF, send it by email, or store it in the cloud.
The use of pdfFiller makes dealing with documents straightforward. Try it now!
CA FTB 540 Instructions Form Versions
Version
Form Popularity
Fillable & printabley
How to fill out where to attch check
01
Place the check in the designated area on the form.
02
Confirm that the check is securely attached to the form.
03
Double-check to ensure that the attached check is the correct amount and is properly filled out, including the payee's name and signature if required.
04
If there are any additional instructions mentioned in the form or accompanying documentation, make sure to follow those as well.
05
It is important to note that not everyone needs to attach a check. Typically, individuals who are making a payment or submitting a deposit may need to attach a check. Organizations or businesses receiving payments may also require the attachment of a check. The specific requirement for attaching a check will vary depending on the purpose and recipient of the form. Please refer to the instructions or guidelines provided with the form to determine if attaching a check is necessary.
Video instructions and help with filling out and completing where to attch check to ca form 540
Instructions and Help about where to attch check
Kits available from one way meeting calm please note it#39’s important to do this with cartridges fresh out of a printer if the cartridge has been sat standing for a while outside a printer results may vary in this kit you will receive the following plus an additional sticker this kit and guide are suitable for the following ink cartridges before proceeding please check that yours is listed here to begin place the ink cartridge in the supplied priming tool ensuring it fits snugly next take the syringe and attach it to the base of the priming tool and remove as much ink as possible until empty or near empty donor reuse the ink from the cartridge and carefully dispose of it as we will reuse the syringe in a moment each Canon cartridge has dimpled area under the label please identify your cartridge from this list to find the exact location of this dimple as this is where we need to create a hole it is important to do this accurately you can neither use the supply drill a bit in the kit, or alternatively we recommend power drill with a similar size trilobite very careful to only drill through the plastic casing and not all the way into the cartridge you can now prepare the ink refill now attach the needle to the empty syringe and filled with the required amount of ink for your cartridge listed here do not overfill you will feel sponge inside the cartridge and it#39;important that the needle is just inside this but not all the way through it forcing the needle all the way down into the cartridge will damage it, so please be gentle once filled carefully wipe the top of the cartridge and place the supplied sticker directly over the original make sure to be as accurate as possible when doing so to avoid covering any vent snow take the empty syringe and reattach it to the base of the priming tool and pull out a small amount of ink to make sure that it#39’s flowing correctly take a piece of kitchen roll or paper towel and press the cartridge down onto it if you filled the cartridge correctly you should see a clear black line lepton the paper your ink cartridge is now ready to use you
Fill form : Try Risk Free
People Also Ask about where to attch check to ca form 540
What is the state tax form for California?
What is an FTB 540 form?
What is line 5a and 5b instructions on 1040?
Who should use form 540 2EZ?
Do I file 540 or 540ez?
What is the difference between 540 and 540 2EZ?
For pdfFiller’s FAQs
Below is a list of the most common customer questions. If you can’t find an answer to your question, please don’t hesitate to reach out to us.
What is where to attch check?
"Where to attach check?" generally refers to the process of physically connecting/attaching a check or a payment document to another document, such as an invoice or a payment voucher, before sending it out for processing or mailing.
Typically, you attach a check by stapling or paper clipping it to the document it is intended to accompany. This helps ensure that the check is easily identified and processed correctly by the recipient.
The specific location for attaching a check can vary depending on the requirements set by the organization or individual to whom you are sending the payment. It is common to attach the check at the top or bottom right corner of the document. However, if there are any instructions provided by the recipient on where to attach the check, it is advisable to follow those instructions precisely.
To avoid any confusion or mishandling of the payment, it's always a good idea to enclose a cover letter or a note with clear instructions along with the attached check. This will help ensure that the recipient processes your payment accurately and efficiently.
Who is required to file where to attch check?
The question is not clear, please provide more context or rephrase the question.
How to fill out where to attch check?
To fill out where to attach a check, follow these steps:
1. Start by writing the name of the recipient or payee on the "Pay to the Order of" line. This could be an individual or a company.
2. In the bottom left corner of the check, you will find a line with "Memo" or "For" written above it. If there is a specific purpose for the check payment, you can write a brief note here to indicate it. For example, you may write "Rent payment," "Invoice #123," or "Donation for XYZ charity."
3. On the back of the check in the top section, you will see a line labeled "Endorse Here" or "Payee's Endorsement." This is where the recipient, or payee, is required to sign their name. Make sure they sign on this line before attaching the check.
4. Finally, you can attach the check to any necessary supporting documents. This might include an invoice, a payment stub, or any other relevant paperwork. Use a paperclip or staple to securely fasten the check and documents together.
Remember to always confirm any specific requirements or instructions provided by the payee, as some may have unique procedures for check attachments.
What is the purpose of where to attch check?
The purpose of indicating "where to attach the check" is to provide instructions to the recipient of the check on where to physically attach or affix it. This is typically indicated in the designated area on the payment or remittance document, such as a payment slip or invoice. By specifying the location, it helps ensure that the check is securely attached and associated with the appropriate payment or transaction.
What information must be reported on where to attch check?
When attaching a check to a document or form, it is typically necessary to include the following information:
1. Payee name: The name of the person or organization to whom the check is payable should be clearly stated. This could be an individual, a company, a charity, etc.
2. Date: The date on which the check is being issued should be mentioned. This helps in determining the validity of the check.
3. Amount: The specific amount of money to be paid should be clearly written in both numerical and written form.
4. Memo/Note: Optionally, a memo or note can be added to provide additional information about the payment or to indicate the purpose of the check.
5. Signature: The check must be signed by the authorized person or account holder. This validates the check and makes it legally binding.
6. Bank account information: Typically, the bottom of the check includes details such as the bank's name, the account holder's name, the account number, and the bank's routing number. This information helps in the processing of the check.
It is essential to review the specific requirements or instructions provided by the recipient of the check, as different organizations may have specific guidelines regarding where to attach or include the check within their documents or forms.
What is the penalty for the late filing of where to attch check?
It is not clear what you mean by "where to attach check." If you are referring to the late filing of a check payment for a specific purpose or transaction, the penalty will depend on the specific rules and regulations of the entity or organization to which the payment is being made. In most cases, there may be late fees or interest charges imposed for delayed payments, but the exact penalty would need to be determined by the specific entity or organization involved.
How do I make changes in where to attch check to ca form 540?
The editing procedure is simple with pdfFiller. Open your 2013 ca 540 instructions form in the editor. You may also add photos, draw arrows and lines, insert sticky notes and text boxes, and more.
Can I sign the ca income tax return instructions electronically in Chrome?
Yes, you can. With pdfFiller, you not only get a feature-rich PDF editor and fillable form builder but a powerful e-signature solution that you can add directly to your Chrome browser. Using our extension, you can create your legally-binding eSignature by typing, drawing, or capturing a photo of your signature using your webcam. Choose whichever method you prefer and eSign your ca state income tax form 540 instructions in minutes.
Can I edit california schedule ca 540 2013 instructions on an Android device?
The pdfFiller app for Android allows you to edit PDF files like instructions on filing california resident income tax form. Mobile document editing, signing, and sending. Install the app to ease document management anywhere.
Fill out your where to attch check online with pdfFiller!
pdfFiller is an end-to-end solution for managing, creating, and editing documents and forms in the cloud. Save time and hassle by preparing your tax forms online.
Ca Income Tax Return Instructions is not the form you're looking for?Search for another form here.
Keywords relevant to 2013 ca instructions form
Related to 2013 form 540 instructions


If you believe that this page should be taken down, please follow our DMCA take down process
here
.
